
NETGEAR is the fastest wireless router around the world. It provides the best series of choices to full fill every type of home networking requirements. But to enjoy the internet efficiently, it is the must that you have installed the router in an accurate way and also troubleshoot if any error found with it. If you are facing a problem with wireless networks, then following article, here we will assist you in troubleshooting wireless network difficulties with your router.
Steps to configure your Netgear router as an AP:
Step 1: Connect a laptop to the Netgear router and open a web browser.
Step 2: Type URL to http://www.routerlogin.com. In case it does not work then type one of the following: http://10.0.0.1, http://192.168.1.1 or http://192.168.0.1
Step 3: Above command will open a window, now fill your login details in like username and password and proceed further.
Step 4: Click Advanced Tab -> then click on the Advanced Setup -> now open Wireless Settings.
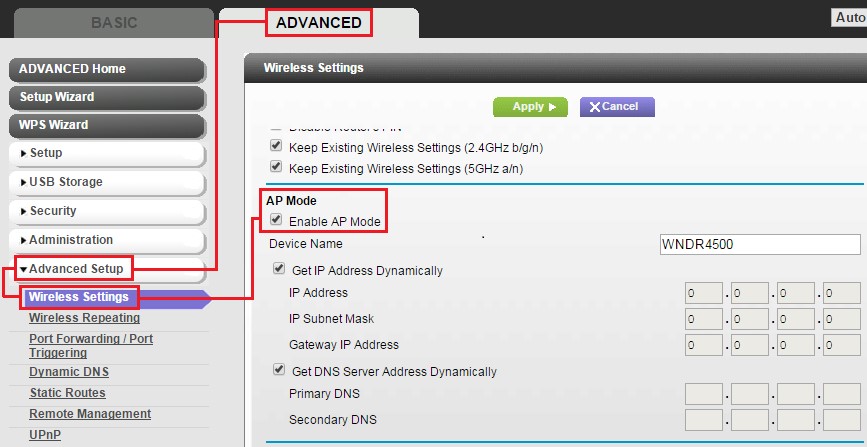
Step 5: Now go to the AP Mode section and then check it the Enable AP Mode.

Step 6: By default both the option Get IP Address Dynamically and Get DNS Server Address Dynamically are set to be configured by the main router on your network or DHCP server. Leave these settings as it is and then click on Apply.
Step 7: Connect simply connect one end of Ethernet cable the LAN or WAN ports of the Netgear router after that connect the other end to a LAN port on your main router.

Your router is set up now with for AP mode. Although, these steps are enough to configure your Netgear router as an AP, still if you found any trouble with these steps or any other issues with this device then call on the Netgear customer number to get assist from experts.